Below is the specific process I took to do my installation. I had researched a lot of it before and some steps came from my own experience. I hope people can use this as a guide, if not step-by-step, but may help someone who is about to do a migration and expose them to some of the things that can go wrong!
I was migrating from a Western Digital 1TB Caviar Blue (7200rpm, 32MB cache) hard drive to a Sandisk Extreme 120GB solid state drive.
 |
| My new SSD ready to be installed |
- This process assumes that your existing system is set up with one internal HDD which is partitioned into two partitions: One for Windows 7 OS (or maybe Vista) and software and the other for data.
- I am not responsible for any damage done to you or your system by following these steps. They are a intended as useful information and a guide only.
- My original intention was to copy my system partition onto the SSD via a Windows Backup and Restore image. While a clean install of Windows is preferable for SSD migration, I found out that if you did want to copy your system drive onto a SSD then the Windows Backup and Restore method was the best way for alignment reasons. I found out it was not.
- Read all steps before following them for your own migration. Many steps aren't needed because of my change in method that I talk about later.
Step 1: Un-install software from your computer that is no longer needed. Not only will this help you reduce the size of your system partition in order to copy onto your new SSD but is a good opportunity for a general system clean as you will probably be dealing with a smaller drive when you are operating from your SSD. I was going from a 146GB system partition to a 120GB SSD. While the data on my system partition was small enough as is, I used this as an excuse for a general system cleanup.
Software I uninstalled included:
- Adobe Illustrator
- All Apple software (Yippee!) including iTunes and Quicktime
- Old games I no longer play
- MATLAB (No longer needed as I have finished uni now!)
- LabVIEW (As above!)
I removed 15GB of data in this step.
Step 2: Disable pagefile and hiberfile (hibernation file storage). The page file is used for when your system runs out of memory (RAM) and reads/writes to your hard disk instead. Many wouldn't have hibernation turned on as it doesn't come enabled in Windows 7. By disabling these functions you can save disk space which will probably be a lot less available on your new SSD.
Instructions to do so are here.
Removed 6GB.
Step 3: Clean system drive using Piriform CCleaner. This software has been a long favourite of mine for cleaning un-neccessary files from your hard drive as well as cleaning up your registry. I managed to remove 11GB of data using this software in combination with Disk Cleanup which comes standard with Windows (Type "Disk Cleanup" in start menu to find it).
Step 4: Check what is taking up drive space using a handy bit of software called Diskdata. This is another old favourite of mine and is useful because it displays in graph form what is taking up storage space. I went through my user data and program files to delete remnants of previously un-installed software using Diskdata.
Removed 10GB.
 |
| Diskdata screenshot |
I moved a total of 23GB by doing this.
Step 6: Defragment your system drive (NOT your SSD!). You can find windows defragmenter in the start menu. Windows defrag is slower than third party software but will do the job. Defragmenting will compress your data on your system drive so that it takes up less room on the drive. It will also speed up the read times of your drive but this doesn't matter to us now as we are about to remove this partition from our HDD altogether.
It is recommended to do an analysis on your drive before defragging and if it is more than 10% fragmented then Microsoft recommends running a defrag. Mine was 7% fragmented but decided to do it anyway. This process took about an hour but can take up to multiple hours depending on the side of the drive/partition.
It is important that you DO NOT defrag your SSD. This is because it only has limited write/erase cycles which defragging will do a lot of and thus needlessly reduce the lifetime of your drive.
Step 7: Make a backup of software or games with particular saved settings, data or updates. I updated my Battlefield 3 folder because despite it saving my profile to the cloud via Origin, I had downloaded and installed countless large (Gigabites in size) updates which I didn't want to do again.
The process for this backup is pretty basic: Just copy your Battlefield 3 folder fro the Origin Games folder to an external drive (OR your data partition) and restore it once you have completed the migration. More details here.
Step 8: Shrink partition size. This can be achieved in Computer Management, accessed by right clicking Computer and selecting 'Manage' and clicking 'Disk Management' in the left menu. You must shrink the size of your system partition to smaller than your destination (SSD) drive size. Hopefully it will let you shrink it enough: For some reason there is a limit on how much you can shrink a drive which I am not too clear on. I was lucky enough that the maximum I could shrink mine was just smaller than the ~111GB that would be available to me on my 120GB SSD.
Step 9 (optional): Backup your personal files to an external drive or network location. This is just in case something goes wrong in the process and you lose your files. I have lost files numerous times in the past and now always take the precaution before performing any decent sized work on my system. This has saved me multiple times.
As part of this step I also copy up-to-date installers of commonly software and drivers to an external location for ease of re-installation.
Step 10: Create an image of your system drive using Windows Backup and Restore. Just click "Create a system image" on the left of the Backup and Restore window. Remember to only image your system drive.
I also took a refreshed Windows Experience Index of my system for comparison after the migration. You can see my system's scores below.
 |
| Windows Experience Index. My system is clearly held back by my current hard drive's data transfer rate. Primary Hard Disk score of 5.9. |
Step 11: Physically install the SSD into your system. The step you have probably (I had been) waiting for is here! Crack open your PC case and mount your new SSD in a spare hard drive bay. Connect up to a SATA power connector from your power supply and connect it via SATA cable to your motherboard. Make sure you earth yourself by touching the PC case with your hand before fiddling with any new hardware. And, obviously, turn the power off to your system before beginning.
I would recommended connecting it to a native Intel port if you have the choice, even if the Intel ports aren't the fastest SATA ports on your board. This is to ensure your computer will definitely see the drive while you are installing and is especially important with updating your firmware (in the next step) as some boot disks won't see the drive on 3rd party ports (e.g. Marvell).
 |
| My brand new SSD and its adaptors. My case only has 5.25" bays hence the adaptor on the adaptor situation above. Looks kinda like a spider? |
 |
| Inside my PC |
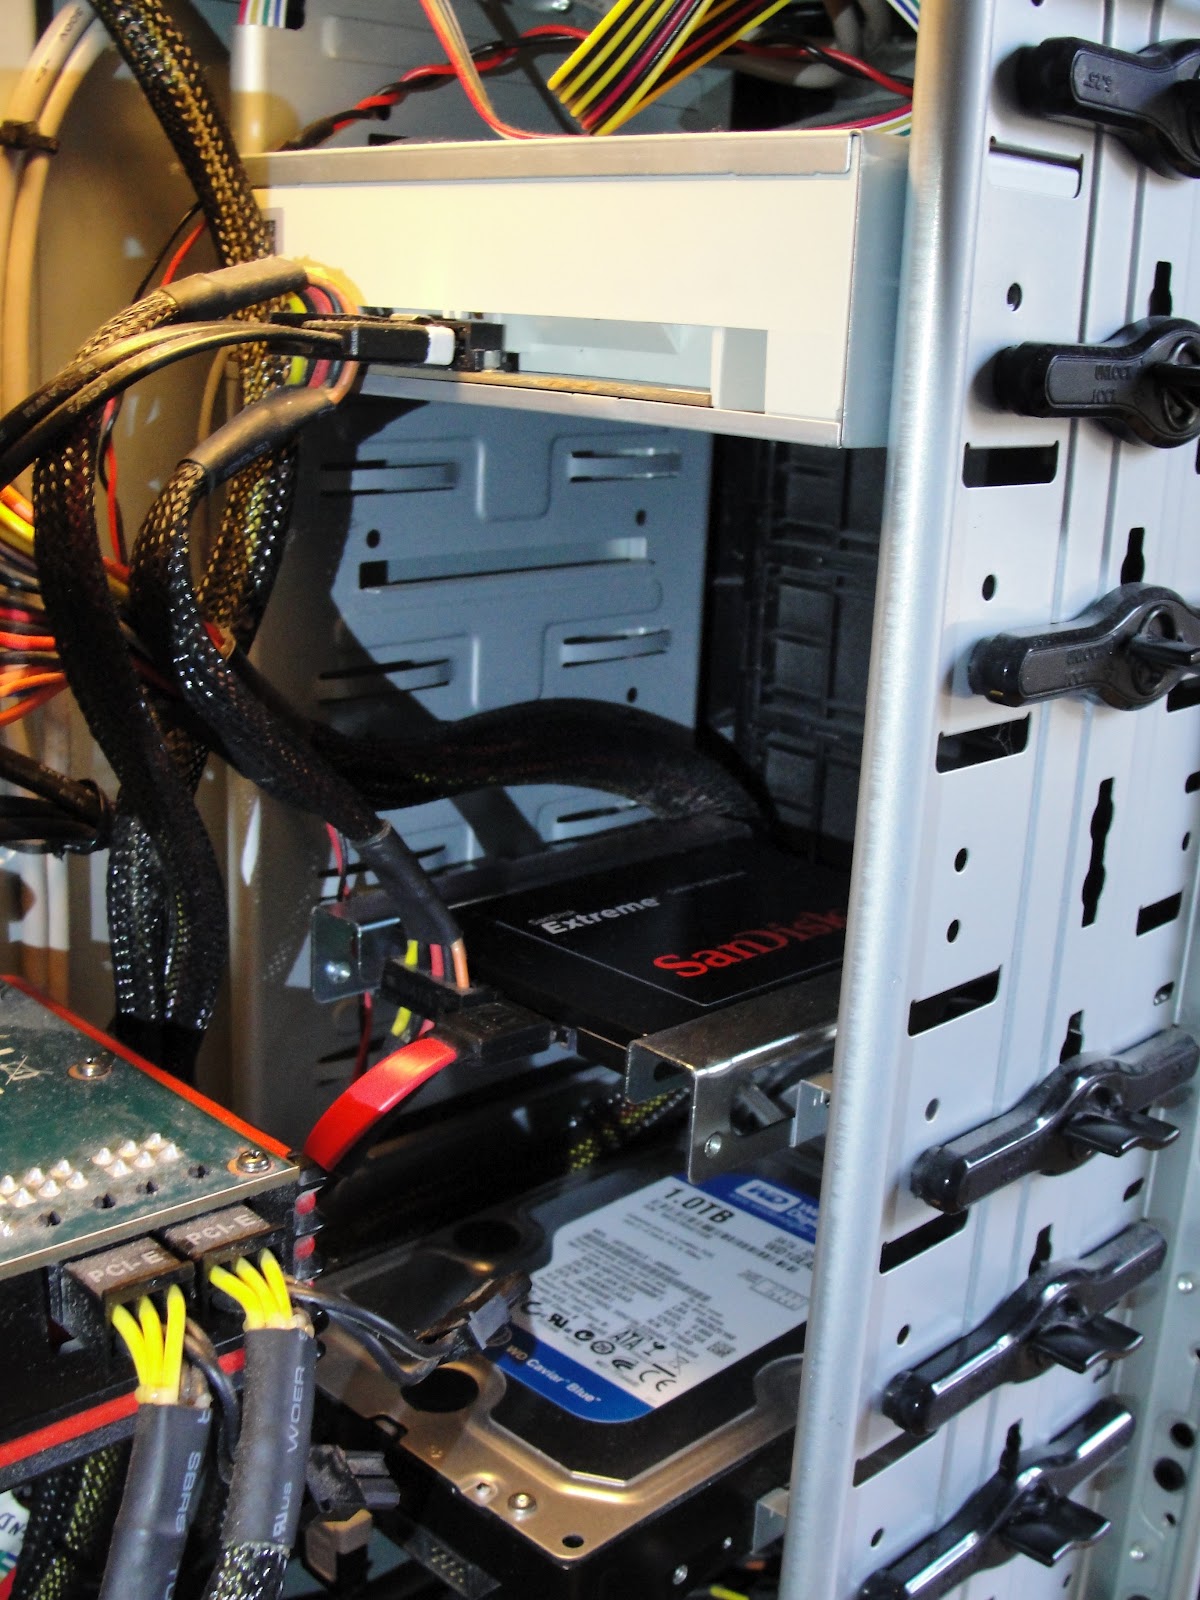 | |||
| The SSD in its new home amongst my old HDD and my DVD drive. |
 |
| Close up of the mounted SSD |
Step 12: Switch your system on and press Delete to boot into BIOS. Make sure your HDD is still higher than the SSD in your boot device priority. This is important because we have some work to do in your old Windows installation before we move along. Also make sure your drives are in IDE mode (unless previously running AHCI fine) as your Windows will not boot until adequate drivers are installed (which I found out the hard way :) ).
Step 13: Upgrade your SSD's firmware. This is important to do before you put any data on it as a firmware upgrade can wipe the whole thing. Upgrading a drive's firmware will increase the reliability and stability of the drive as well as increasing the speed of the drive so it's definitely worth doing. The process is different for each manufacturer but the process for SanDisk drives is to download the SanDisk SSD Toolkit. This software identifies your drive and searches for any firmware updates. If there is one, it downloads it and creates a boot disc/flash drive that you boot from after restarting. This is where it is important to have your drive plugged into a native SATA port.
 |
| SanDisk SSD Toolkit software |
 | |
| The Sandisk Firmware Updater (Boot disc) progress screen. |
This where my problems began.
Every time I would select the SSD as my target drive and my image on my external HDD to restore from, I would get the following error:
 | |
| Image restore error. I never want to see this again. Note the easy-to-follow formatting. |
After hours of restarting, un-plugging and re-plugging and booting into BIOS to change my boot order I stumbled upon an important bit of information. I knew that the destination drive must be larger than the image size's partition, not how much data is on it. However, as it turns out, Windows Backup and Restore creates an image the size of your whole allocated drive space despite only selecting your system drive to image. Even if you have a system partition followed by unallocated space followed by a data partition (as I had with my computer and in the screenshot below), it will create an image the size of the whole drive and will only restore onto a drive the same size or larger. The only way you can use this restore method to migrate to a smaller capacity drive is to remove your data partition so the only allocated space is the system drive. Or you can move your data partition right "next" to your system drive so the unallocated space is at the end of the disk but the image (and required destination size) will be the same as your system and data partitions added together. What a pain.
 |
| Disk Management of my system (After Migration). An image of the Windows7OS partition on Disk 1 (HDD) takes into account the whole size of the disk because of the location of the DATA partition. If the DATA and unallocated space swapped locations on the disk, you still wouldn't be able to restore the image of only Windows7OS to a disk smaller than the size of the OS and DATA partitions added together. Thanks, Microsoft. |
This is where my plan had to change. I had three options:
- Copy all my Data to external drive and delete it from my internal HDD, re-image and restore
- Take an image of my system drive and ONLY my system drive using 3rd party software and restore
- Install a fresh version of Windows and start "from scratch"
Now you can understand why this process took me so long, why I decided to write about it (to try and save someone else the time I wasted) and why many of the above steps are useless!
New Method!
Step 15: Install Windows onto your SSD. There are hundreds of guides on the internet as to how to do this so I won't go into any detail. In short:
- Disconnect your HDD from your motherboard to save confusion and risk of overwriting it
- Boot your system from the Windows install disk
- Clear all partitions that may exist on your SSD
- Select your SSD as the target install location
 |
| Windows 7 Install screen |
A clean install of Windows 7 on my SSD came to 21.0GB in size. This gave me 90GB of space to play with which I was happy about as I wasn't sure initially that the 120GB drive (With only 111GB usable space) would be big enough.
You should notice how fast Windows boots from your new SSD. I'm telling you now: It's fast. If you hadn't already, make sure your drive is now plugged into the fastest SATA port available to you. I had mine plugged into a SATA 3GB/s Intel port during installation for reasons above, but then moved it to a Marvell 6GB/s port which allowed even faster load times. I made a cheap and nasty comparison video of startup and shutdown videos which is below.
I then installed all neccessary hardware drivers that came on my motherboard DVD as well as any updated ones I had saved over the years. I then installed basic software such as Firefox, Microsoft Office, Microsoft Security Essentials (Free, lightweight and good antivirus for genuine Windows), Nero Burning ROM and PDF reader (I use PDF X-Change reader as I think Adobe reader is too heavy and slow with few features. PDF X-Change isn't the prettiest but does everything you could ever want from a PDF reader). I let Windows Update do all required updates and I then finally I performed a system image (yes, using Windows Backup and Restore) for the sake of future system recovery should anything go wrong- Something I always do when I do a fresh OS installation.
Step 20: Remove your old Windows 7 partition from your HDD and extend your data partition to the size of the whole disk. I haven't done this yet because I like to be able to boot back to my old installation to check any settings or things I may have forgotten to do with my new install. I will probably keep my old Windows 7 installation for another month or so before deleting.
I also get the sneaking suspicion that to do this I will actually need to delete the old windows data from my system partition, move my personal data to that partition and delete the old Data partition due to the restriction to only extend partitions in one "direction". Not sure on that one though.
UPDATE! 24/6/12: I found out the hard way (as usual!) on how to do this. I tried extending my data partition into the unallocated space before I deleted my old windows partition. Bad idea. This converted the disk to a dynamic disk which cannot be converted back to a basic disk without deleting all data on it. So I ended up copying all of my data to an external HDD before deleting all volumes on the drive and converting back to a basic disk using the diskpart function in command prompt (accessed from the Windows 7 recovery disc).
Step 21: SSD tweaking. As I said before, Windows 7 (not previous versions except maybe Vista) should have detected your OS is on a SSD and should have done a lot of tweaks for you to improve performance, extend the life of and save drive space on your SSD. Some things I checked/did:
- Removed my page file on the SSD but enabled one on my HDD (Your computer will restart if it runs out of RAM and pagefile is not enabled)
- Checked that TRIM was enabled (it was)
- Checked that my partition was aligned properly (it was)
Step 22: Enable AHCI mode on your SSD. Instructions for doing so can be found here.This should help, albeit marginally, to speed up your drive even more.
If you find after enabling AHCI that your disk drive(s) are now showing up in the "Safely remove hardware" icon in your system tray as I did, you have three options:
- Ignore it
- Hide them using this method if you are using an Intel port
- Hide them using this method if you are using a 3rd party controlled port (e.g. Marvell)
Step 24 (Optional): I recommend installing some useful software for the purpose of monitoring and testing your brand new SSD. I installed:
- AS SSD Benchmark for benchmark testing my drive [Download]
- SSDLife Free to monitor the use of my drive and it's expected lifetime
 |
| SSDLife analysis of my SSD. Nearly 9 years to go woohoo! |
Conclusion
So there you have it! After a big change of plans mid-way through the process, I finally got my system back up and running from my new SSD. I have noticed huge speed increases, especially in load times and would say dollar-for-dollar is one of the best upgrades you can do on a slowing PC.
To save yourself the hassle, I would wholeheartedly recommend performing a clean Windows installation on your new SSD rather than mess around with images. It may seem like the more difficult option but after trying both methods I think a clean install is the better method.
I have done a few comparisons between HDD/SSD, Intel (3GB/s)/Marvell (6GB/s) ports and IDE/AHCI modes which you can see below:
Comparison of startup and shutdown times between my old HDD and new SSD
 |
| Windows Experience Index with SSD (3GB/s Intel Port, IDE). Primary Hard Disk score of 7.3 (HDD's score was 5.9) |
 | ||
| Windows Experience Index with SSD (6GB/s Marvell Port, AHCI) Primary Hard Disk score of 7.9. |
 | ||
| Benchmark of SSD (Intel 3GB/s IDE) |
 | ||
| Benchmark of SSD (Marvell 6GB/s IDE) |
 |
| Benchmark of SSD (Marvell 6GB/s AHCI) |
Ive never had to go through so much BS to upgrade a drive to SSD.
ReplyDeleteStep 1: Perform Shadow Protect Backup
Step 2: Install SSD
Step 3: Restore Shadow Protect Backup to SSD
Step 4: Boot Computer
Thats it, your done!
I agree with you Eric that there are much easier ways to go about it but I was trying to do it without the need for third party backup software.
ReplyDeleteYour method will work fine but you will need to do a lot of the SSD optimisations manually such as checking partition alignment, turning off the page-file and enabling TRIM.
As above, I think the best method is to do a fresh Windows install but it's certainly not the only way. The main aim of this post was to help out anyone thinking of doing a migration the same way as me.
Advancments in buy SSD hard drives can be linked to many areas. While it is becoming a hot topic for debate, spasmodically it returns to create a new passion amongst those who study its history. It still has the power to shock so called 'babies', many of whom fail to comprehend the full scope of buy SSD hard drives
ReplyDeleteGreat information. I am trying to use this to migrate form HDD to SDD, but I can't migrate. Thanks for me.
ReplyDeletewindows migration